On the Documents tab the user will be able to generate reports and see workflow data for individual documents. If you need to generate report for Batches, Users or Jobs use the Reports tab.
NOTE: When creating Document Reports for the first time make sure to use the Synchronize Document Data button on the Batches tab for the desired Batches.
When custom fields are needed those steps can be followed to create customized fields and to link a field to a ChronoScan list.
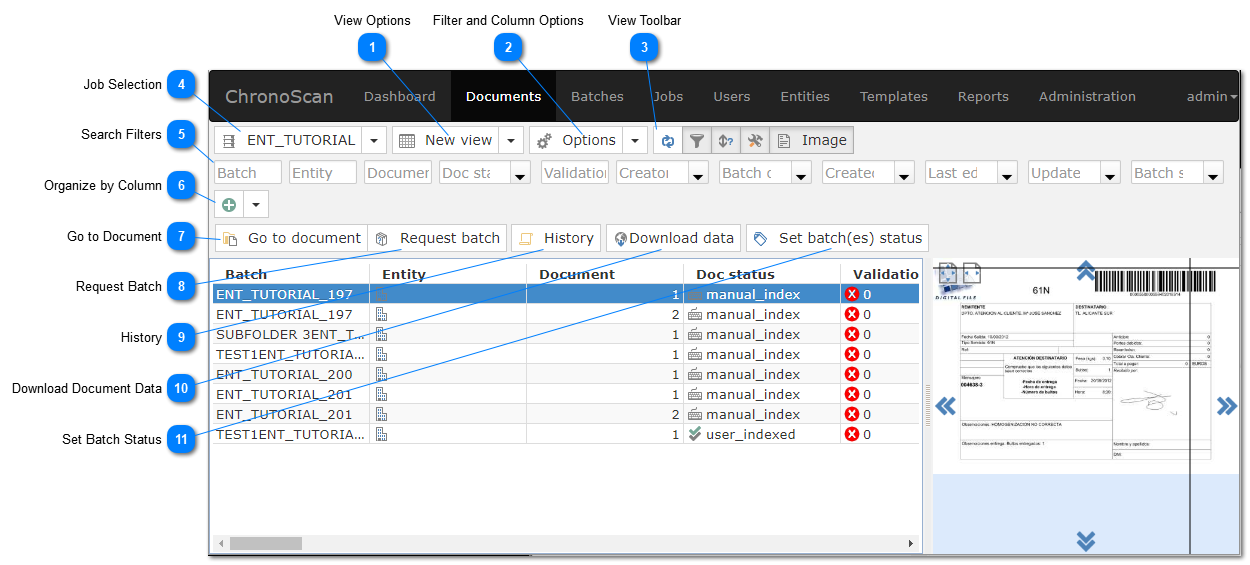
View Options
Using the View options it is possible to generate new views and save them. It is possible to save changes to the current view, remove the current opened view and save the current view as a new view.
On the Filter and Column options menu it is possible to select which columns are visible and sort them in the current view. It is also possible to generate custom filters using the Default Filter Option.
On the view toolbar it is possible to hide and show individual elements on the screen such as the filter and sort panels. Great for cleaning up the current view.
It is also possible to refresh the current view if the latest changes on the system do not reflect on the current information being displayed.
Using the search filters it is possible to apply filters to the current view based on either criteria given by the dropdown menu or typed in by the user.
Complex filters can be created by using more than one column at a time.
The download data button will allow the user to download document data. The downloaded file will contain all the displayed data in csv (comma separated) format.