Document Validation on the ChronoScan Enterprise workflow will follow a somewhat rigid hierarquy. As ChronoScan Enterprise was built as a multi-user environment with simultaneous access through the web interface, or thin client, it was meant to allow several users to intervene at the same time from their own computers whenever documents fail the validation rules set for each Job. That means that ChronoScan Enterprise was not meant to remove user intervention altogether as that is a unachievable goal whenever we are working with scanned document files coming from several different sources with varibale degrees of errors, but it was meant to allow several users to participate in the data indexing process at the same time whenever validation rules are not met and data needs to be manually input or corrected. Thus it doesn't remove user intervention but it allows faster problem solving whenever a document is not going through the workflow correctly.
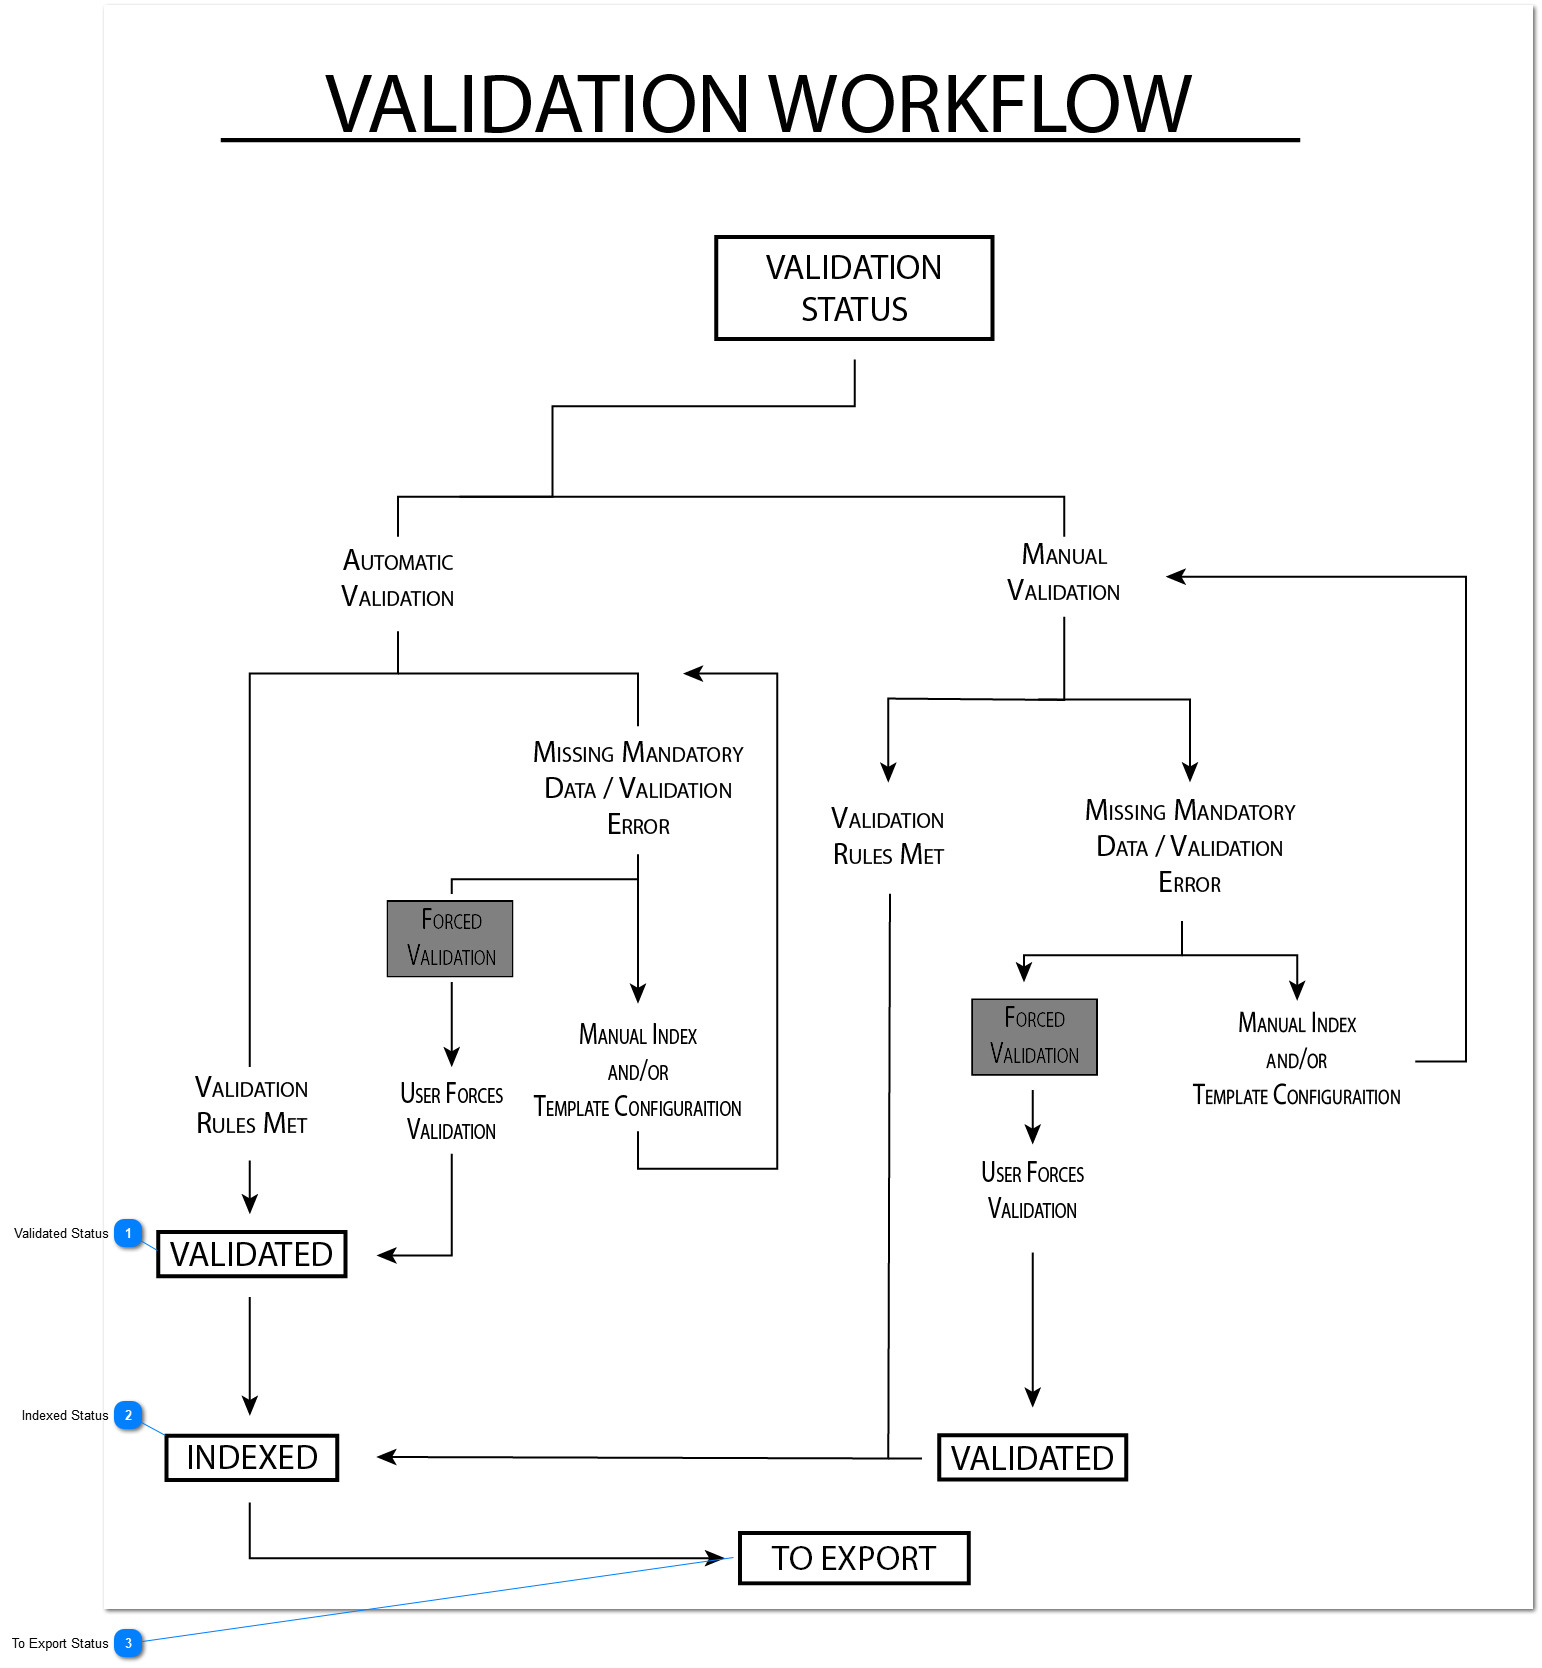
The flowchart above was designed to help users understand how the validation of documents is performed and how it fits in the entire Enterprise workflow. The purpose of this article is to help administrators understand how they can manipulate the validation workflow to fit their needs.
A Job can be setup with Automatic or Manual validation. To enable automatic validation the user must enable the "Mark all documents as indexed after processing" on the Processing Options inside the Jobs Tab. The "Automatically mark documents as indexed if all validation rules are met (after processing or user data input)" option on the Data Entry and Error Correction Options also inside the Jobs Tab will have a similar effect but will enforce the existing validation rules.
By default ChronoScan will not enable the export of batches that contain document with errors. To allow ChronoScan to export documents with errors deisable the "Don't export batches with errors" on the Export Options on the Jobs Tab.
Setting up and editing validation rules must be done on the desktop interface, or thick client, on the properties for each field or OCR Zone.
Validated Status
A document will be automatically set as validated if all validation rules are met and all mandatory data is in place.
A document is marked as indexed after a user has been through it and all the mandatory data has been captured. It is possible to automatically mark the document as idexed by enabling the "Mark all documents as indexed after processing" option on the Processing Options inside the Jobs Tab.