ChronoScan's main interface is composed of four main tabs that provide different and specific tools and functions.
On the Scan/Input tab it is possible to import and scan documents in order to start working on them, create and manage Batches, create Jobs, process and read imported documents and other advanced functionality.
Via the Data Entry tab it is possible to setup OCR Fields to capture data from your documents, Grids to capture table formatted data, manage and create Document Types and navigate the documents in the Batch. It's main function is to setup a Job for a specific Batch of documents with similar information that needs to be extracted.
The Tasks/HotFolder tab is the main automation hub on ChronoScan. It is possible to setup and configure HotFolder tasks using previously created Jobs fully automating the data capture, extraction and export process.
The whole interface is fully customizable. That is particularly useful on the Scan/Input and the Data Entry tabs where each view and panel can be placed on several different positions or just float on the desktop.
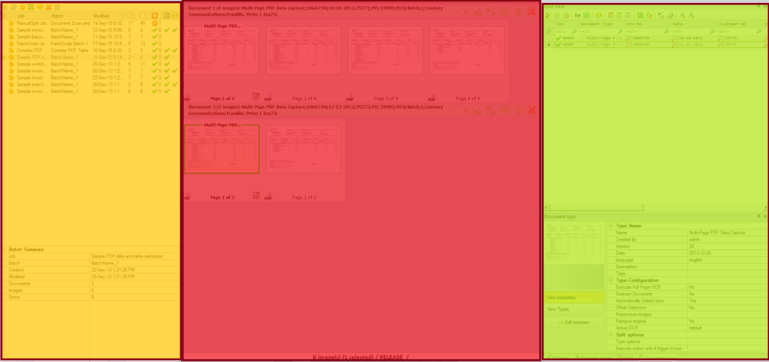
The default interface is divided into three main blocks as shown on the picture below, each color represents one main area:
Three main areas of the default ChronoScan interface. It is possible to make it simpler or more complex as desired.
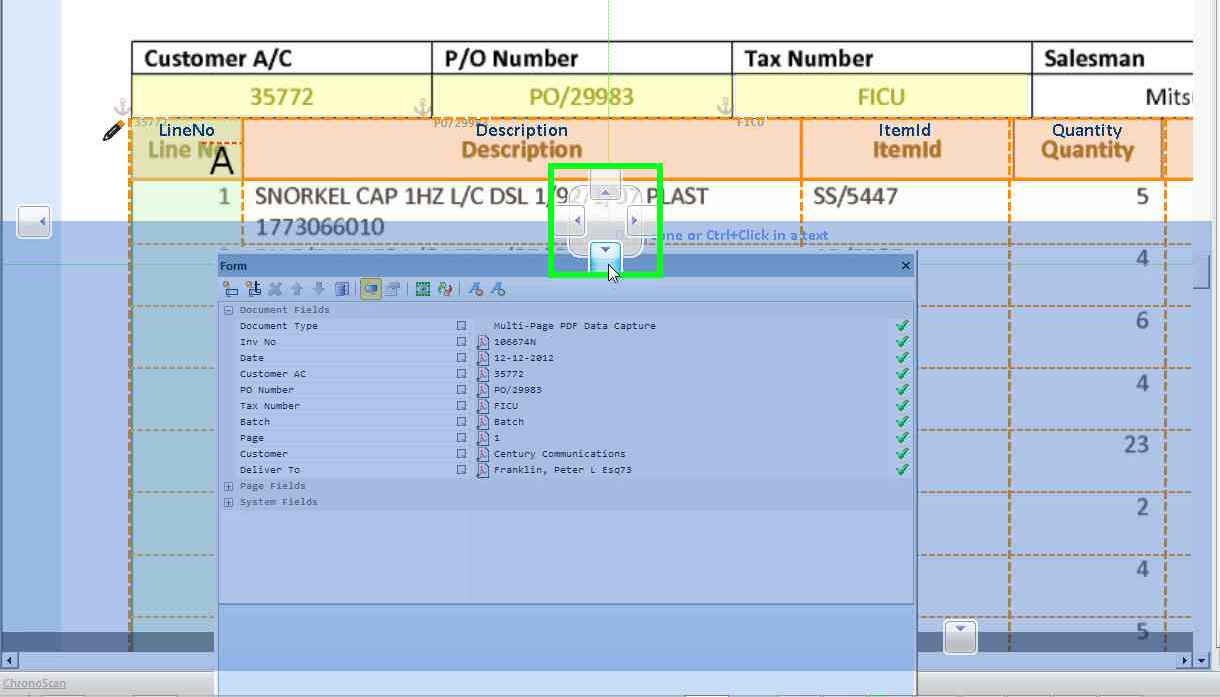
In order to start moving panels around you have to click and hold the left mouse button on the name of the panel you want to move and drag it around the three main areas to position it using the anchors as shown below, if no anchor is selected while dragging the panel will float:
The highlighted anchor will provide positioning within the current area. The up and bottom anchors will split the area horizontally and the left and right anchors will split the area vertically.
The highlighted anchor that shows up at the left, right, top and bottom borders of the screen will create a new area with the selected panel.
The interface can be positioned as shown in the video below: