4.2. 2. Step by Step Installation Guide
After all the prerequisites are met installation and setup can begin.
Follow all the following steps to install a ChronoScan Enterprise Web Server.
-
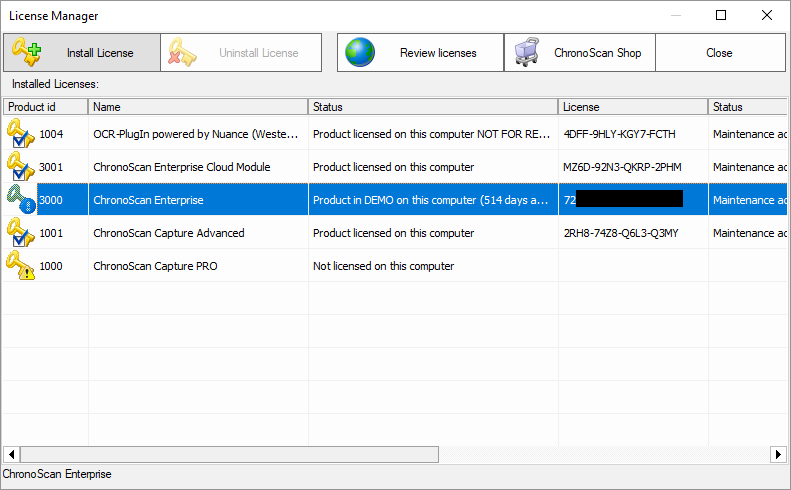
1. Install all of the
Software Pre-Requisites
and activate your licenses on the
ChronoScan Desktop license manager window
:
-
2. Create a SQLServer Database on your SQL Server:
-
Follow the instructions on WCI SQLServer Database Creation to create the SQL Server database that will be used by ChronoScan
-
3. Change the ChronoScan program settings:
-
Start ChronoScan Desktop
-
Navigate to Administration tab > Program Settings:
-
Under Administrator e-mail:
-
Set your administrator e-mail and SMTP settings to allow ChronoScan to send out email notifications;
-
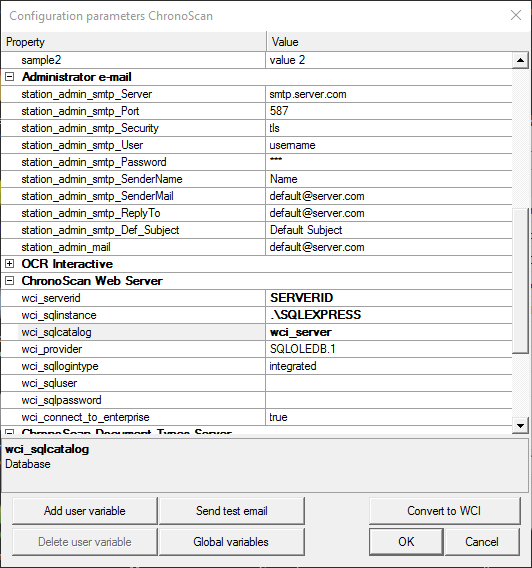
Under ChronoScan Web Server:
-
Change wci_sqinstance to match your SQL server address (you can copy this field from the server name on the SQL Management Studio);
-
Change wci_sqlcatalog to match the database name created on the SQL Server Database Creation step (wci_server by default);
-
If you use SQL Credentials to log into the database change wci_sqllogintype to sqlserver and inptut your user name and password. Those are our user access recommendations;
-
Change wci_connect_to_enterprise to true;
-
Now restart ChronoScan and open the Program Settings one more time. This time you will be required to insert the admin credentials for ChronoScan Enterprise to log into the software. The username is admin and the password is 12345.
-
If you did not receive any package with sample data, click on the Convert to WCI button:
-
This will populate the SQL database and should only be run once. When this process is finished a text log file will open.
-
If any errors show up on this step it means the database information set on the previous steps is wrong.
NOTE: Make sure "wci_connect_to_enterprise" is set to "true" when the server is setup and the clients are ready to connect.
After installation and setup is done follow to the next section to install the ChronoScan Server Services.
 |
|
ChronoScan Program Settings Window
|