To generate a default masterkey setup use the Accounts Payable Wizard on the Job Wizard. This window will allow the user to perform all the required tasks in order to have a out of the box masterkey setup. More about masterkey setups can be found here.
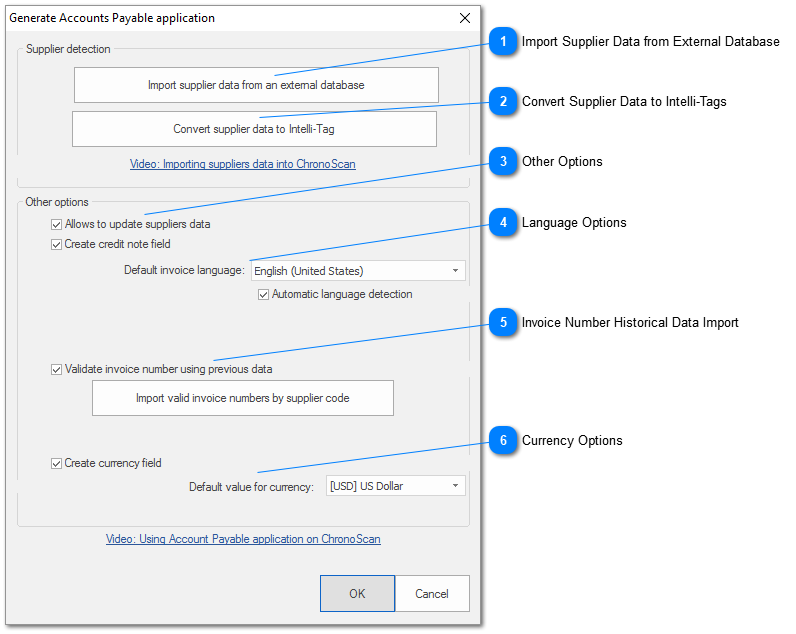
Import Supplier Data from External Database
The first button will allow the user to import external data from their own Master Vendor database into ChronoScan's own database so the data can be used to detect the supplier on each document. It will open the External Data Import Window .
This button will convert the imported data into static value Intelli-Tags that will be used for supplier identification. It is a mandatory step when creating a masterkey setup.
Enabling this option will allow users to add and remove vendor information imported into ChronoScan using the Lookup Viewer. Very useful to add data that was not in the master vendor database and that can be used to identify each vendor more accurately. That added data can also be edited later.
Create Credit Note Field
This option will create a credit note field that can be manually set to true or false for each document. Using this field document set as credit notes can be processed differently at export.
There is the possibility of importing a list of existing invoice numbers so that masks can be automatically created to validate invoice numbers on documents. It will open the Import Validation Mask/Values window.
The currency field can be added by enabling the Create Currency Field option. The currency for each vendor will be saved as a currency field on the database. It can be manually set for each vendor by using the Lookup Viewer.