5.8.5.1. Grid Setup
Grids are used to capture tables and line items from documents in a very fast and efficient way. To use a grid the user must first ensure at least one grid control is enabled on the Fields settings for the current Job (It must be setup on ).
The grids on ChronoScan have advanced options for handling a wide range of custom capture needs. It is also possible to use triggers to make sure the grid positioning is correct across all pages.
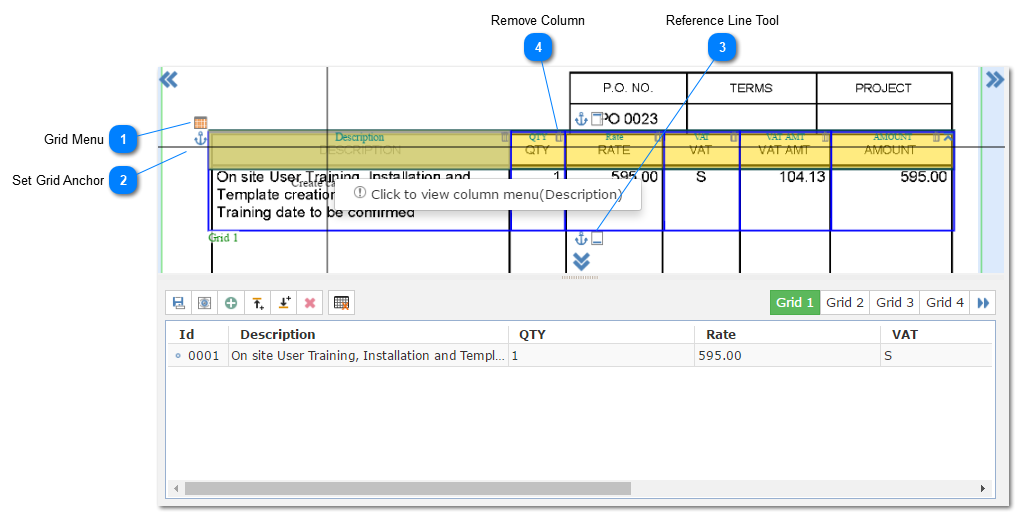
The main step in the grid setup process is to choose the master column and to set the basic row options, which can be done by clicking on each header column to open the header menu or column menu for the desired column.