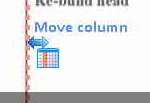
After creating the data capture Grid the rows and columns should be adjusted. The first step should be to adjust the columns by moving and removing the unneeded ones to fit all the data that needs to be captured. Deleting a column is done by clicking on each column header field to show up the Grid header menu and selecting the Delete Column option. In order to move a column around the mouse should be close to one of the horizontal column lines, the cursor will change to Move Column, like the image below:
The next step is to setup the entire Grid option on the Grid Menu as shown here.
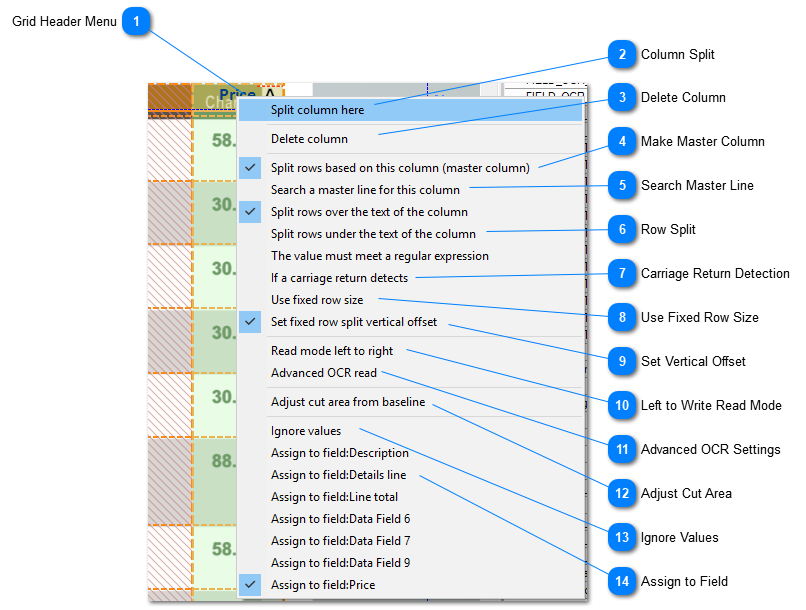
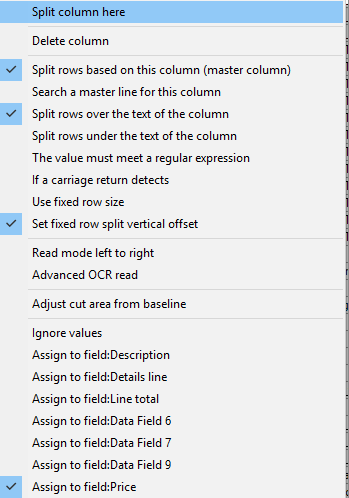
The Grid Header Menu might have slightly different options depending on it's Type, more on the different Data Capture Field settings and configurations can be found here.
Grid Header Menu
The Grid Header menu will help setting up the columns for the Grid and how the rows are split. The option available on the Grid Menu will vary slightly depending on the Field Type set for this Column.
When this option is enabled the problem with cells that contain more than one line of information that needs to be captured as a single line will go away. When carriage return mode is selected the user will need to input the desired minimum spacing between rows. This makes ChronoScan detect cells containing more than one line of information. Learn more about carriage return detection here.
When this option is selected the Row Height Window will pop up asking for a fixed manually entered row height and number of rows. This option should be selected when ChronoScan is having trouble acquiring the correct row sizes.
The vertical offset option will allow you to set a vertical offset from the detected text on the Master Column. Very useful when working with grids where the vertical alignment of all columns is not the same.
This will make ChronoScan ignore all values currently on the Grid cells for that entire column. It is useful if a certain value is not intended to be captured and processed.
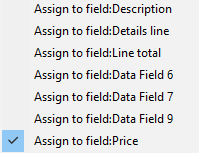
The Assign to Field option can be used to change columns within the grid or, if the user added fields after creating the Grid on the document, those fields can be added in. It also enables to add previously removed fields on the Grid.