3.5.4.2. Document Type Read Configuration Toolbar
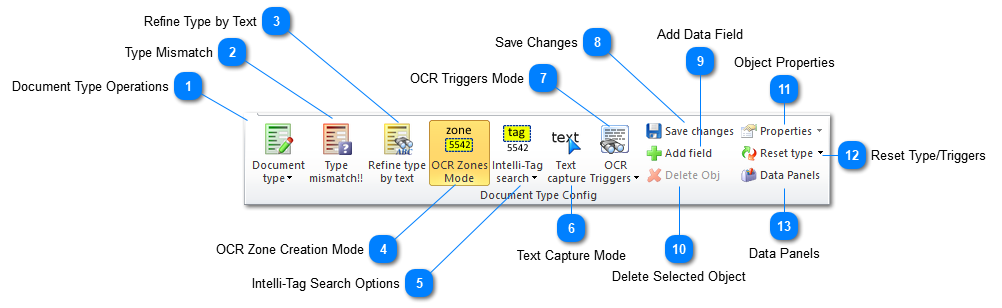
This is the main toolbar of the Data Entry Tab, here you have the tools to create OCR Zones, Grids, Triggers and Intelli-Tag tools.
 Document Type OperationsAll of the document and Job related Document Type tasks can be performed on this menu.
|
|
 Type MismatchIt will create a new document type for the current document.
|
|
 Refine Type by TextThe Refine Type by Text button will allow to create a Document Subtype from specific text as a trigger,
every time ChronoScan sees specific text on a page it will define that specific subtype to the page, useful for triggering page split.
This button will change the cursor to "New OCR Trigger", after creating the desired search area the subtype trigger dialogue will open up.
|
|
 OCR Zone Creation ModeSelect this function and click on a field on the Form View to create a OCR Zone for that field.
|
|
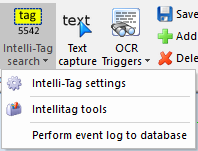
 Intelli-Tag Search OptionsSelect this function and click on a field on the Form View to create a Intelli-Tag for that field. This button also offers other Intellig-Tag settings on the dropdown menu.
The Intelli-tag tools option will open the Intelli-Tag Tools Window where the user can view all activity related to intelli-tags.
To enable activity logging for intelli-tags enable the Perform event log to database option.
|
|
 Text Capture ModeThe text Capture button activates the Send Text to function.
You can click on a field on the Form or Grid View and create an area around the text you want to send to that field,
the cursor will change to "Send Text To". Very useful when OCR Zones are not a practical solution.
|
|
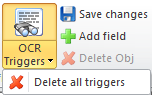
 OCR Triggers ModeThe OCR Triggers Mode function enables the creation of triggers and it's menu allows to remove all existing triggers.
This will activate the "New OCR Trigger" cursor,
create an area to capture the text you want to use as trigger to open the
|
|
 Save ChangesThe Save Changes button will save all the settings for the current batch.
ChronoScan auto-saves often, but it is never too
much to make sure all the changes are always saved.
|
|
 Add Data FieldThe Add Data Field button will Add a new Data Field to the Form View. When you click on it you will be prompted for the new Data Field name,
input the desired name and click OK to add the new Data Field.
|
|
 Delete Selected ObjectThe Delete Selected Object button will delete the selected Object on the Current Page view. It can be used to remove OCR Zones and Triggers.
|
|
 Object PropertiesThe Object Properties menu show a few options for the selected object.
You can set the visibility of a OCR Zone, in which page it will show up, the OCR
Engine to be used for that object and a few more options.
This menu is documented here.
|
|
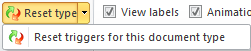
 Reset Type/TriggersThe Reset Type/Triggers option will reset the current document type to it's default,
If you click on save changes that will make the actual configuration the default.
The reset triggers for this document type will delete all the
triggers associated to the current document type.
|
|
 Data Panelswhere you can enable Data Grids and configure it's options.
More on Data Grids can be found here.
|
|