6.9.10. Scheduling reports
Enterprise / Reports / Scheduled Reports / 2. How to schedule a report
Since version v1.0.3.83
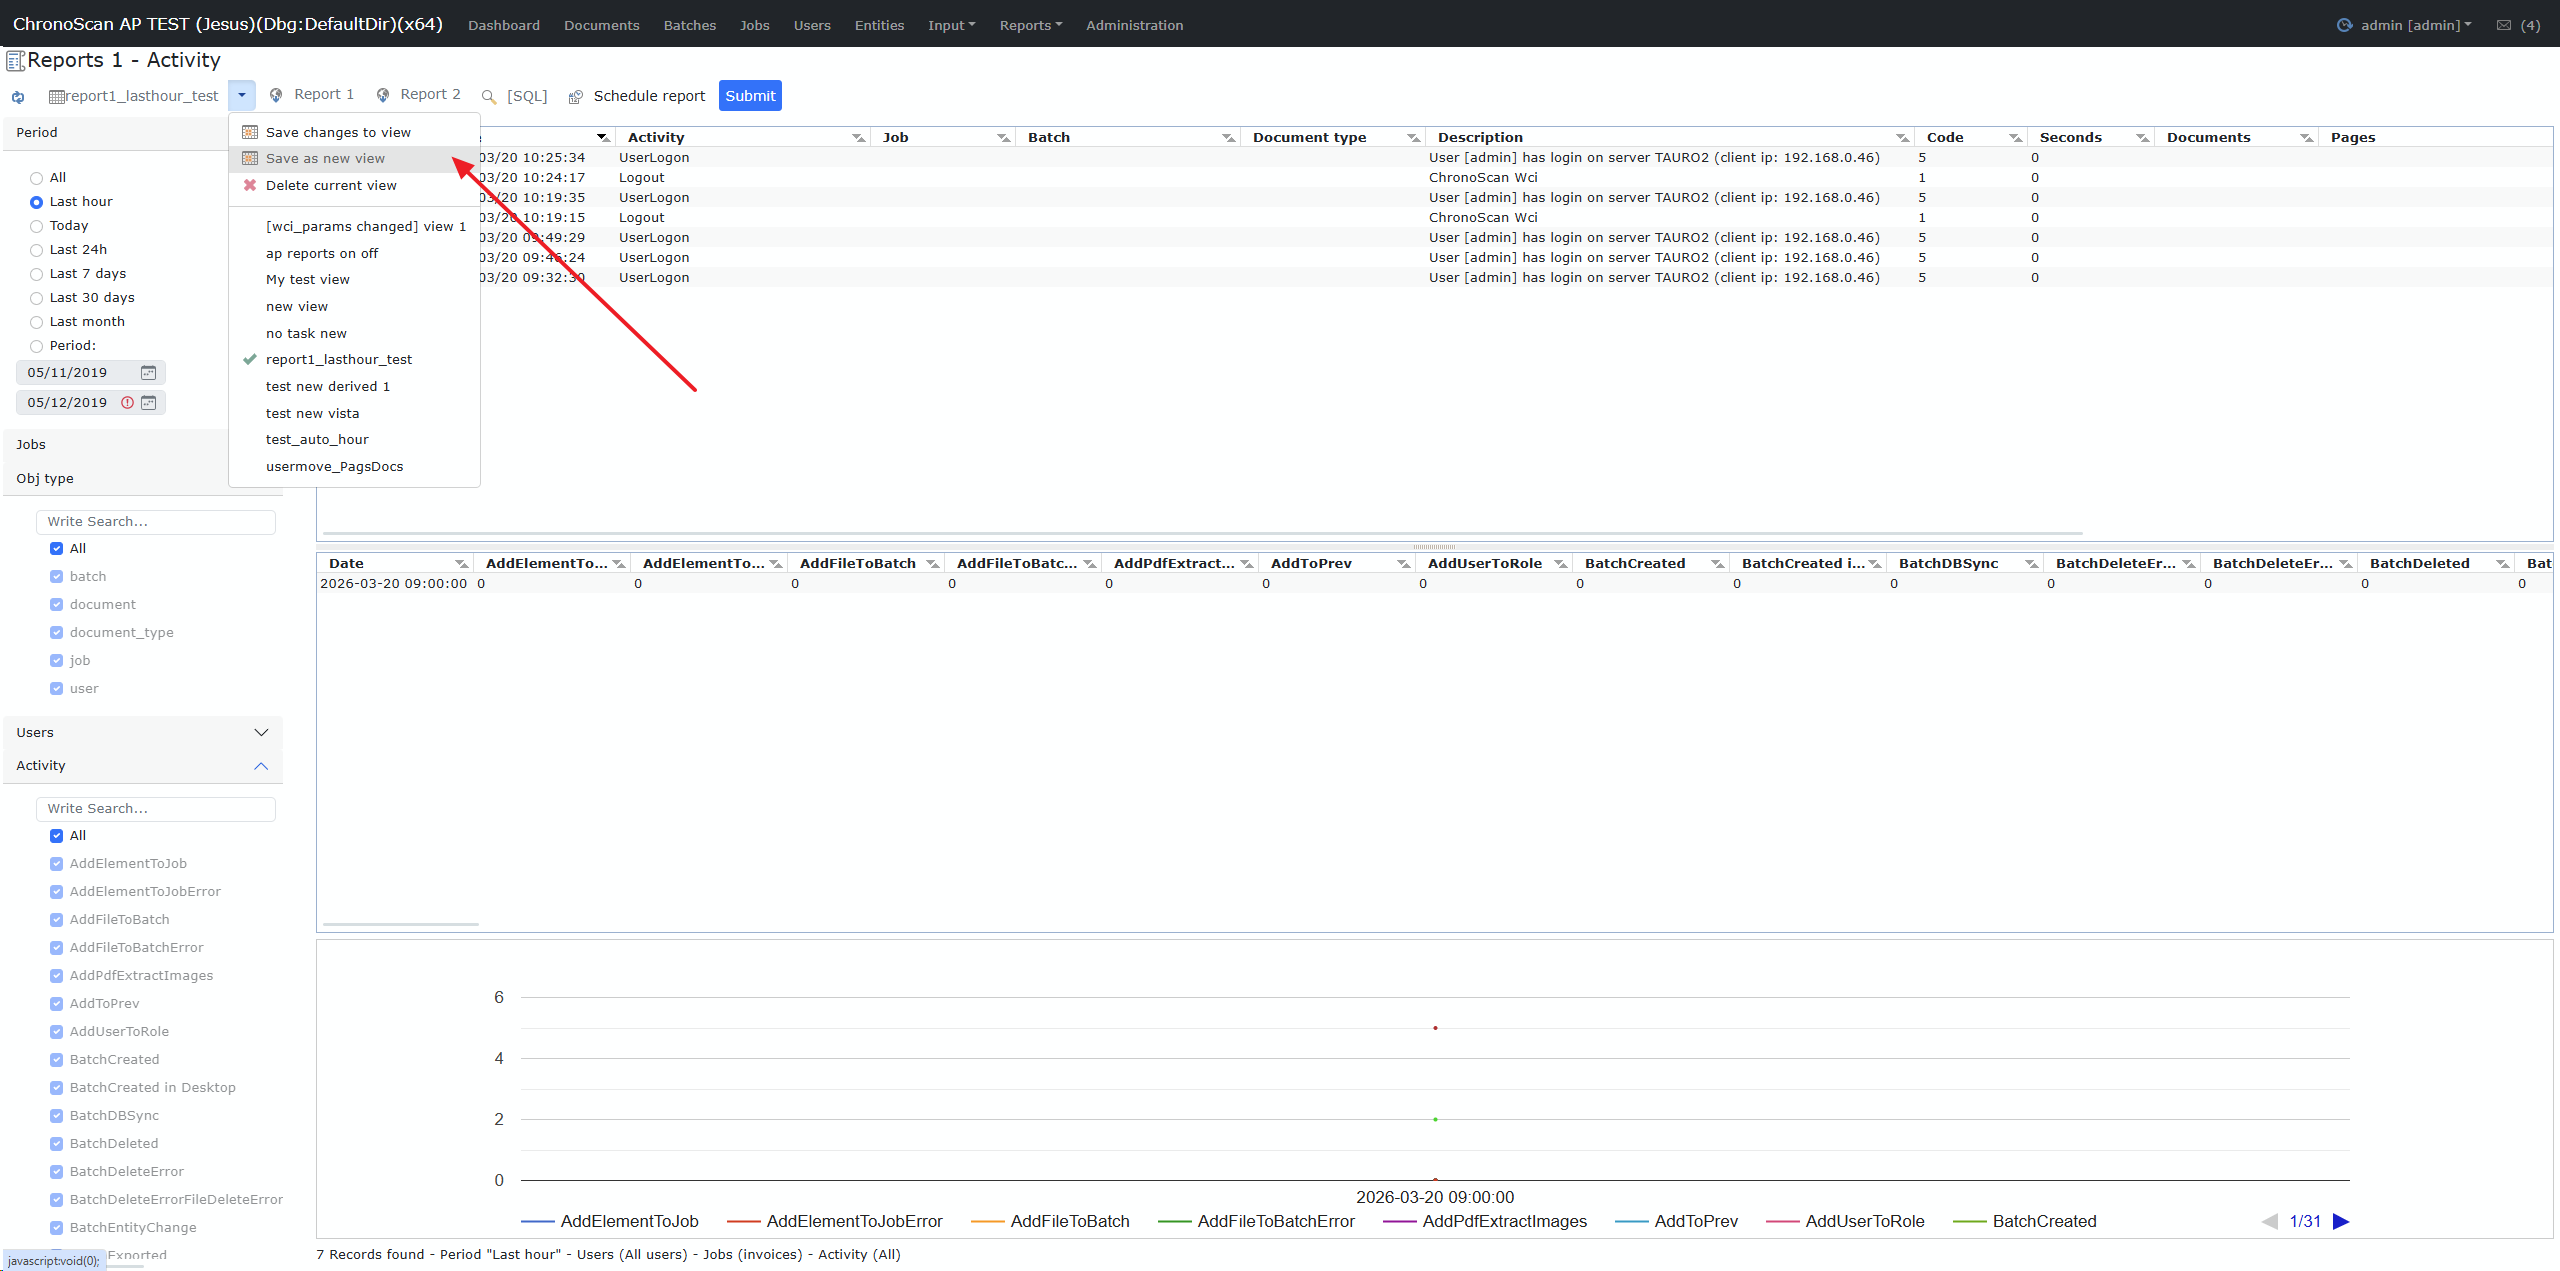
1) Create a view first
Scheduled reports are always based on a saved view. If the view is not saved, it cannot be scheduled.
Steps:
1. Open Reports → Reports 1 – Activity
2. Set filters (period, users, jobs, activities, etc.)
3. Click Save changes in the view or Save as new view
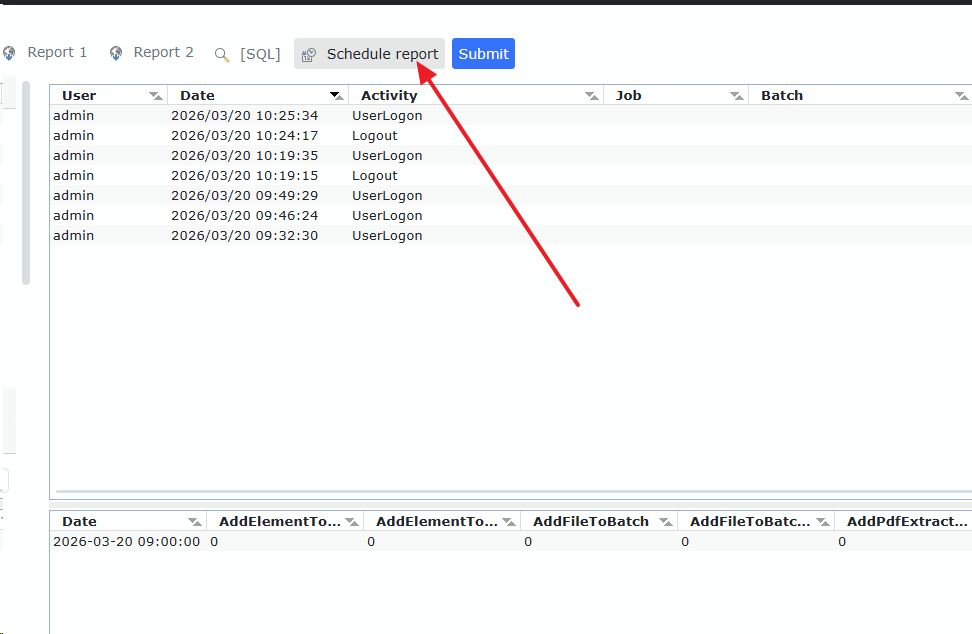
2) Open the scheduling dialog
Once the view is saved, click Schedule report.
-
If the view is not saved you will get a warning.
-
If already scheduled, the dialog will open in edit mode.
Task editor window (Schedule report)
This dialog allows you to create or update a scheduled task for the current view.
Form settings explanation
|
Setting
|
Description
|
|
Starting date
|
Date when the task can start (yyyy/mm/dd).
|
|
Time
|
Time of day the task should run (hh:mm).
|
|
Repeat task
|
If enabled → task is Recurring. If disabled → task is Scheduled once.
|
|
Repeat every
|
Recurrence interval: Month / Week / Day / Hour
|
|
Destination directory
|
Folder where files are created (local only). Default: %program_data%\\TempReports\\Scheduled
|
|
Destination
|
Local / Azure Blob Storage / Azure File Storage
|
|
Azure profile
|
Required if destination is Azure. Select a profile created in Azure Profiles dialog.
|
|
File name
|
Base file name for report output.
|
|
Output formats
|
Multiple formats can be selected: XLS / CSV / JSON / XML
|
|
Send via email
|
Sends the report to recipients after generation (SMTP must be configured).
|
|
Recipients
|
List of ChronoScan users. Multiple emails separated by ;.
|
|
Force start from last generated report
|
If checked, next execution starts from the last execution period_to to avoid gaps.
|
|
Include activity description
|
Adds a new column with translated activity description.
|
|
Append timestamp to file name
|
If checked, filenames include _YYYYMMDDhhmmss.
|
|
Active
|
Enables or disables the scheduled task.
|
Info: When Starting date, Time, Repeat task or Repeat every changes, the Next execution panel is recalculated.
Next execution panel
Shows when the task will run next. Remember to click Save after making changes.
Output file naming
If Append timestamp is enabled, filenames will include:
|
<filename>_YYYYMMDDhhmmss-<execution_type>
|
Where:
-
execution_type = auto (automatic execution)
-
execution_type = manual (manual trigger)
-
If disabled → no timestamp suffix.
Azure destinations and profiles
If you choose Azure Blob Storage or Azure File Storage, you must create/select a profile.
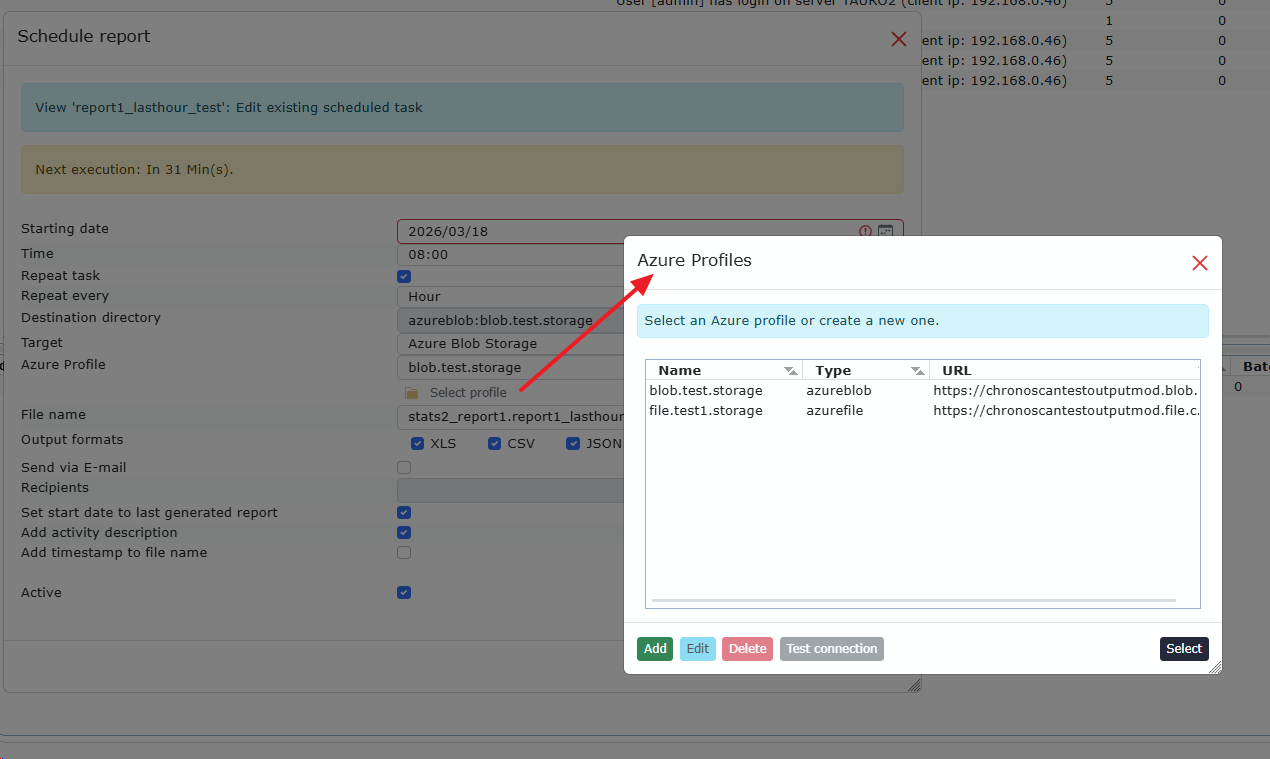
How to create an Azure profile
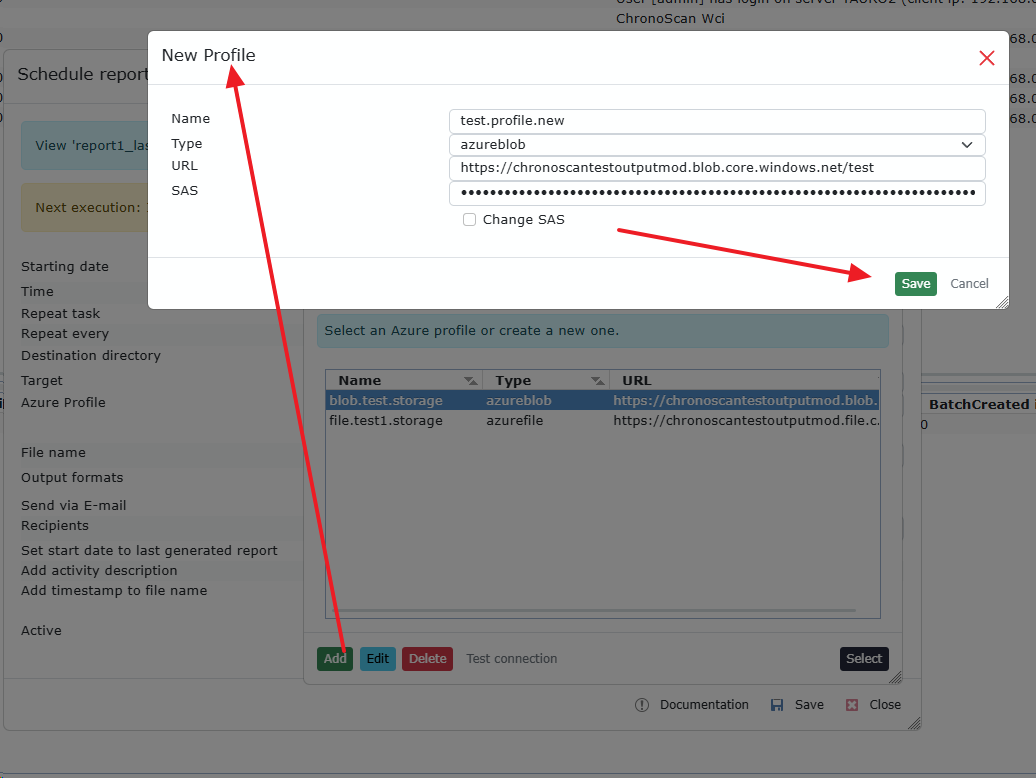
1. Click Select profile → Manage profiles
2. Click Add
3. Choose Type:
-
azureblob for Azure Blob Storage
-
azurefile for Azure File Storage4. Enter:
-
Profile name
-
Account URL (container/share URL)
-
SAS token (tokens are encrypted on save)5. Click Test connection to verify access6. Save and select the profile
How to get Azure URL and SAS Token (Azure Storage Explorer)
You can obtain the URL and SAS token directly from Azure Storage Explorer.
Steps
1. Open Azure Storage Explorer and connect to your Azure account.
2. Navigate to the storage account and choose:
-
Blob Container (for Azure Blob Storage)
-
File Share (for Azure File Storage)3. Right-click the container / share and select “Get Shared Access Signature”.4. Configure:
-
Permissions (Read + Write + Create + List)
-
Start / Expiry time5. Click Create.6. You will see:
-
URL → copy the URL (without SAS at the end)
-
Query string → copy as SAS token
* Example:
|
URL:
https://mystorageaccount.blob.core.windows.net/reports
SAS token:
?sv=2022-11-02&ss=bfqt&srt=sco&sp=rwdlacup&se=2026-05-01T00:00:00Z&st=2024-05-01T00:00:00Z&spr=https&sig=XXXXXXXX
|
* Use the URL and SAS token when creating the Azure profile in ChronoScan
Enterprise / Reports / Scheduled Reports / 3. Managing and monitoring scheduled report tasks
Under Reports → Scheduled reports you can manage and monitor all tasks.

Information columns
-
Report name
-
Original view
-
File name
-
Task type (Scheduled / Recurring)
-
Repeat interval
-
Last execution
-
Status (Success / Running / Error)
-
Next execution
-
Active
Actions
-
Open destination folder (if local)
-
Edit scheduled task
-
View executions report
-
Trigger report manually
Executions report
Shows execution history for each task.
Status values:
-
PENDING – queued (10 min before execution)
-
RUNNING – task in progress
-
FINISHED – completed OK
-
ERROR – failed (see error_log)
Emailing status:
-
[Send to] configuration is off
-
(success) mail sent
-
(error) mail failed (SMTP issue)
-
(denied) invalid ChronoScan user
You can also trigger the task manually from here.
How scheduled tasks are executed
Scheduled reports run in the WebServer process.
-
If WebServer is down → tasks won’t run
-
If task is PENDING, a new process can take over
-
If task is RUNNING and server stops → task ends with error
-
Tasks timeout after 10 minutes in RUNNING