5.8.8. Final approval stage
Since v.1.0.2.95
On this stage users granted the Final Approval privileges can approve each document before exporting.
When active, the final approval stage is located between the manual index stage and the ready to export stage, meaning that specific users will have to make decisions over the batches that are waiting approval in order for them to continue with the enterprise workflow.
When a batch steps up from the manual index with the approval workflow active, it will enter the approval phase and its documents will have the waiting_approval state.
From that moment, batches will be stored int he new "Batch(es) waiting approval" inbox waiting for the approvers to enter the approval view and make different decisions;
'Approve documents', 'Reject documents' and 'Send to revise/ manual index' (optional).
*New inbox for batches waiting approval
These batches will go to the ready to export status when the sum of the approved documents plus the rejected documents equals the total number of documents of the batch.
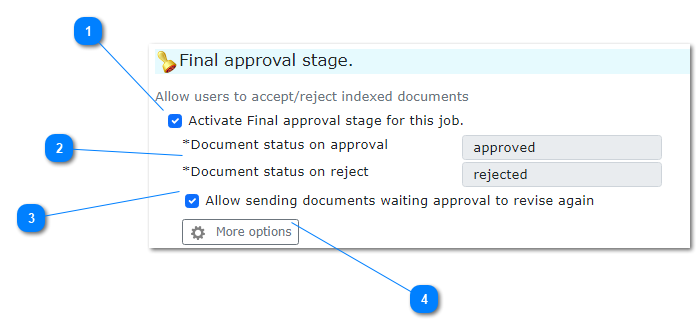
First lets activate the approval stage.
1. Activating the final approval stage for a Job
The final approval stage is not active by default. To activate it, navigate to the Jobs tab on enterprise, select the Job > workflow > approval stage and check on the activate checkbox.
|
Activates/ deactivates the approval stage for the Job
|
|
|
Information about the status the documents will have. Readonly
|
|
|
If checked, the approval workflow will have an extra decision button for sending documents back to the manual index stage
|
|
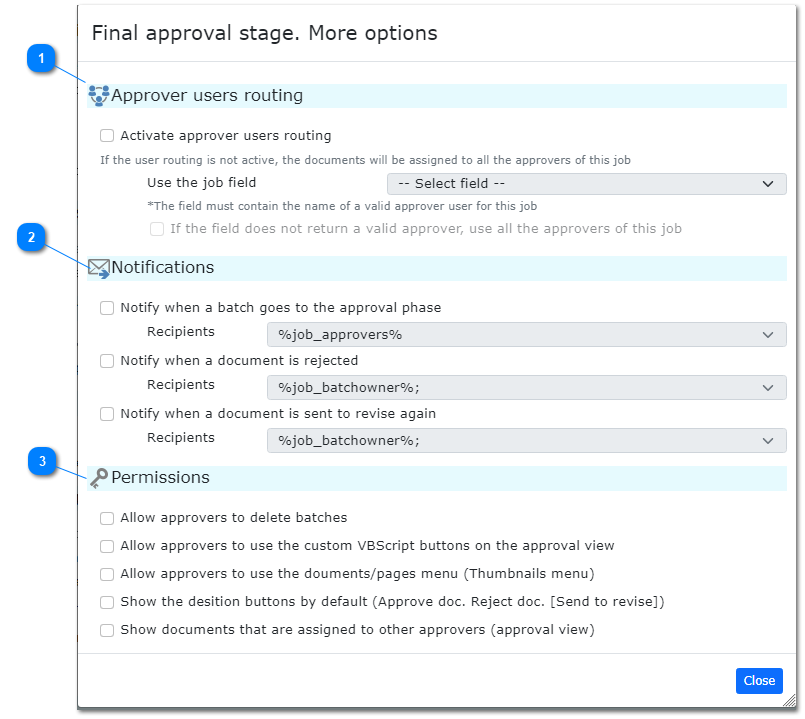
1.1. Other options dialog for the approval stage
|
The user routing allows to assign approvers based on a Job field value.
This value must be an existing valid approver user name.
If this option is not checked, all approvers designated to the job will be assigned.
|
|
|
Activates/ deactivates the notifications and recipients for the different approval workflow stages.
|
|
|
Extra permissions for the approval workflow
|
|
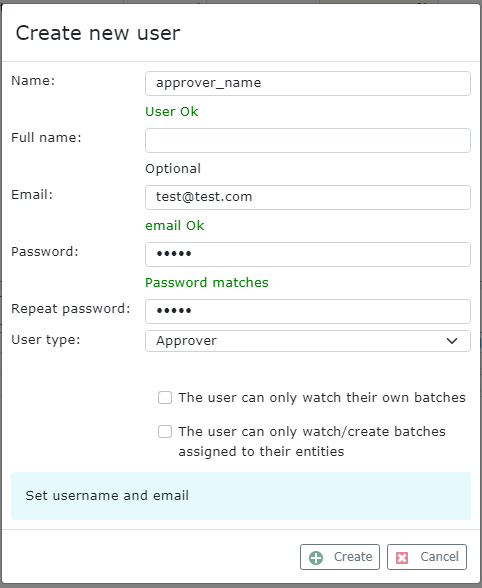
2. Creating approver users
Once the approval workflow is activated and configured, we need to create approver users and give them the permissions on the Job.
To do so, go to the Users tab and create a new user with the user type approver.
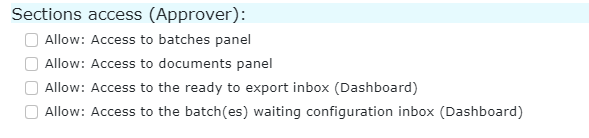
Once created, we can give some special permissions for approver type users. (select user > edit user > permissions)
2. Giving the approver users access to the Job
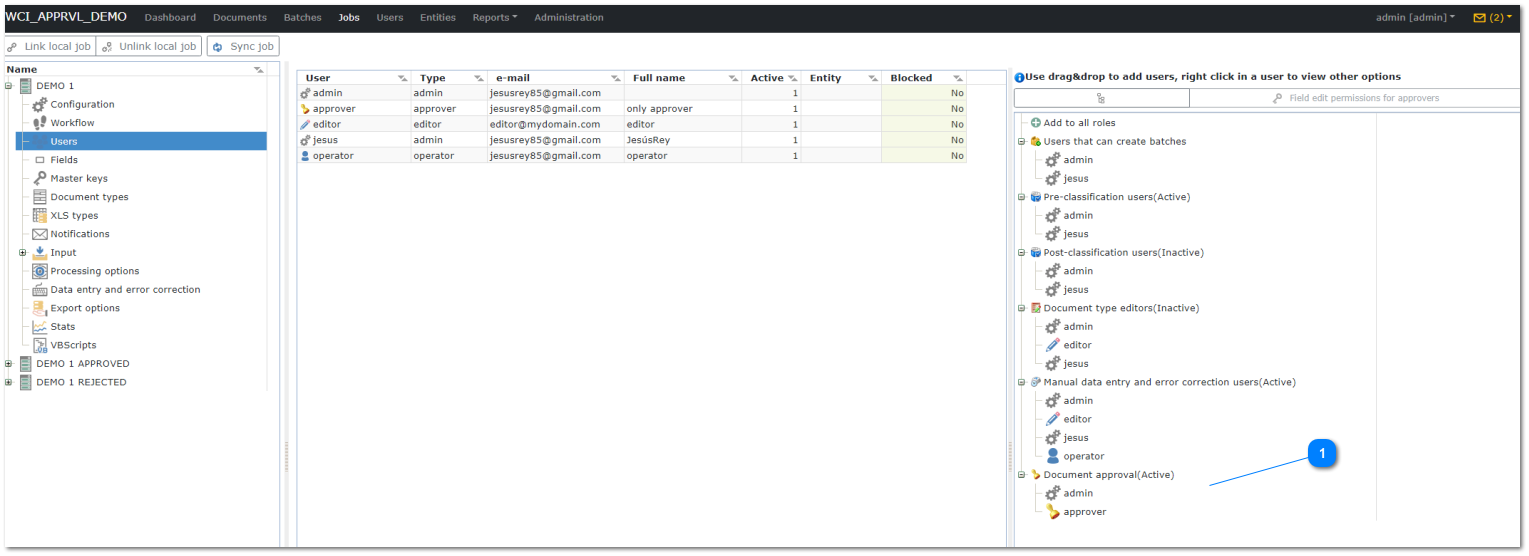
Now we will give the approver users the permissions over the desired job:
Navigate to Jobs > users > drag and drop the approver user over the Document approval role
|
Drag and drop your approver user here to give him access to the Job.
* Only admins and approvers can be added here.
|
|
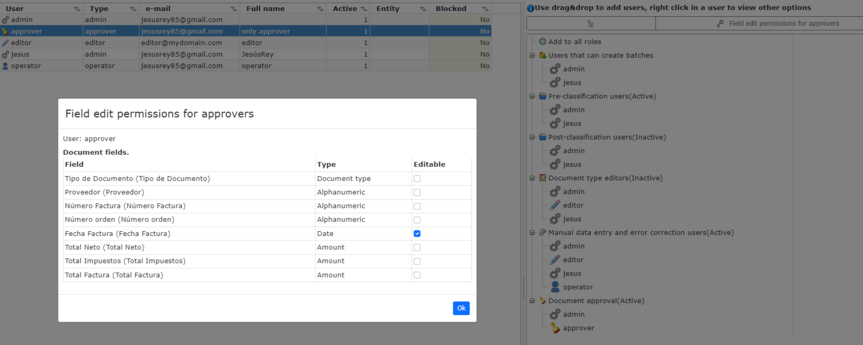
2.1 Giving approver users edit permissions on the Job fields
By default, the approvers can't edit the Job fields on the approval view, but we can give them permission to do it by selecting the user and clicking on the "Field edit permissions for approvers" button located above the roles treeview.