Importing can also be done by dragging and dropping the files from windows explorer into ChronoScan's Scan/Input tab. Files can also be imported automatically using HotFolders, learn more about HotFolders here.
Currently it is possible to Import Image Files such as TIFF, JPG and PDF Images using the Import Images Input Module;
When manually importing (drag & drop) PDF Files the user will see the Add PDF File window.
All of the settings for the three import modules can be found explained here.
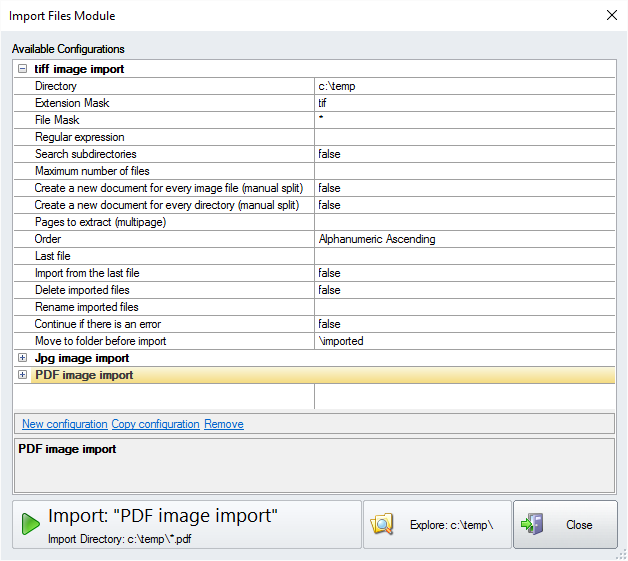
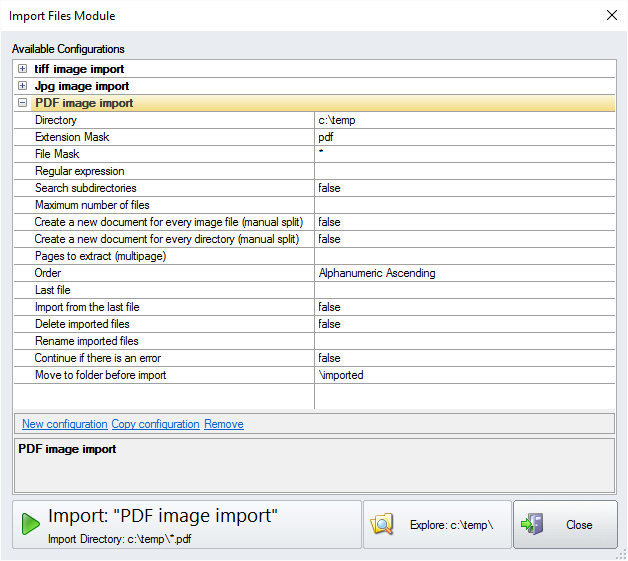
Selecting the Import Image Module will open the Import Files Module window where you can choose to work with PDF Image files, JPG files and TIFF files. More on importing images here.
Selecting the Import PDF Module will open the Import PDF Files Module window where you can setup the PDF import options. More on importing PDF files here.
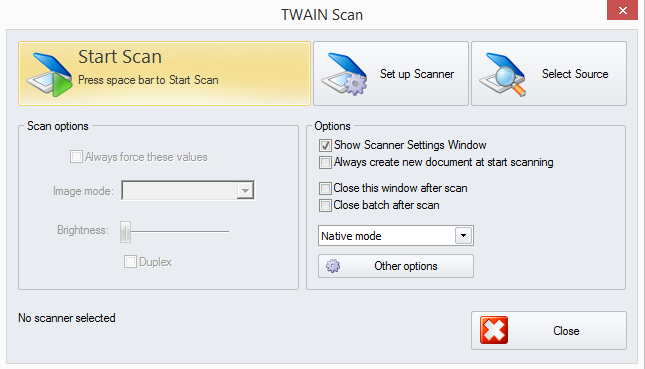
Use a TWAIN compatible scanner to get the files into ChronoScan using the TWAIN Scan Input Module;
Selecting the TWAIN Scanner Module will open the TWAIN Scan Input Module where you can setup the scanner options. More on importing files using a scanner here.
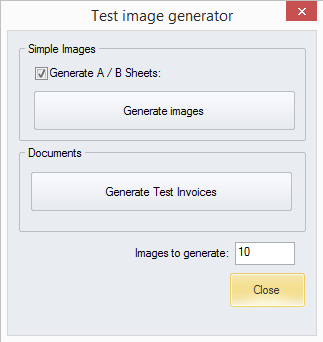
It is also possible to generate random invoices or images for test purposes using the Generate Images Input Module:
Selecting the Generate Images Module will open the Generate Images Input Module where you can pick from a few test files options. More on using test images here.