×
Menu

7.5. Batches Indexing

 
7.5. Batches Indexing
 
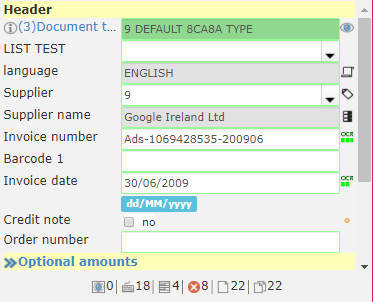
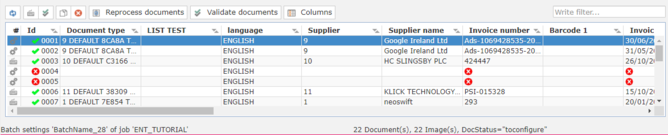
On the indexing window users can index/correct data on the ChronoScan application.
Depending on the user type you will be able not only to index but also edit the document type.
 
The main goal of the operator user is to validate all pending documents on the batch, correcting all errors and setting the document as validated by clicking on the Validate Document button or by hitting ENTER on the keyboard after indexing is done.
The main goal of the editor user is to validate all not configured document types on the batch, adding, removing and editing OCR Zones, OCR Triggers, Data Grids and Intelli-tags.
Operator users can be setup to be similar to either editor or indexer users by giving them the ability to create and edit OCR Zones and intelli-tags.
It is also possible to setup the job in a way that documents with errors can still be validated by a user.
 
 
1

Zoom

1. Zoom
 
Using the zoom buttons it is possible to zoom to the width or height of the current document.
 
2

Panel and Views

2. Panel and Views
 
Use the panels buttons to show/hide the thumbnail view, the data grid view and the data panels view.
 
3

Document Filters

3. Document Filters
 
Use this menu to filter the current documents.
 
 
4

Data Capture Toolbox

4. Data Capture Toolbox
The Data Capture Toolbox provides all the needed tools to create a powerful template to capture all the desired data on a document.
 
    OCR Zone Tool.Use this tool to create a OCR Zone that will capture data on all of the documents of the same type.
    Text Select Tool. Use this tool to manually select a bit of text to send to a specific field.
    Intelli-Tag Tool. Use this tool to create new Intelli-Tags.
    Triggers Tool. Use this tool to create Triggers.
    Document Drag Tool. Use this tool to easily drag the document view with the mouse.
 
5

Document notes

5. Document notes
The notes button opens current document notes on the Document Notes Window.
 
6

Options

6. Options
 
1 - Zoom the image to the focused field.
2 - Zoom the image to the focused field, but with image width zoom.
3 - Shows/Hides image labels.
 
7

Reprocess Batch

7. Reprocess Batch
The reprocess batch button will send the entire batch to reprocess.
 
8

Finalize Batch

8. Finalize Batch
 
Click on the finalize button when done.
This will send the batch to the next workflow step and move you back to the dashboard.
 
9

Main Input Panel

9. Main Input Panel
 
The main input panel is where the user can see all the data captured as well as change from intelli-tag settings to masterkey settings.
Learn more about it here.
 
10

Thumbnail view

10. Thumbnail view
 
On the thumbnail view the user can see and sort the documents and pages on the current Batch.
Depending on the job settings the documents that met all validation rules set for the job might not display on the thumbnail view.
It is also possible to check the status for each document on the icons on the top right of each thumbnail image.
 
11

Document Type Editing Panel

11. Document Type Editing Panel
On the document type editing panel it is possible to set specific settings about the current document type as well as validate it.
This panel only shows up if the Batch is under Batches waiting configuration.